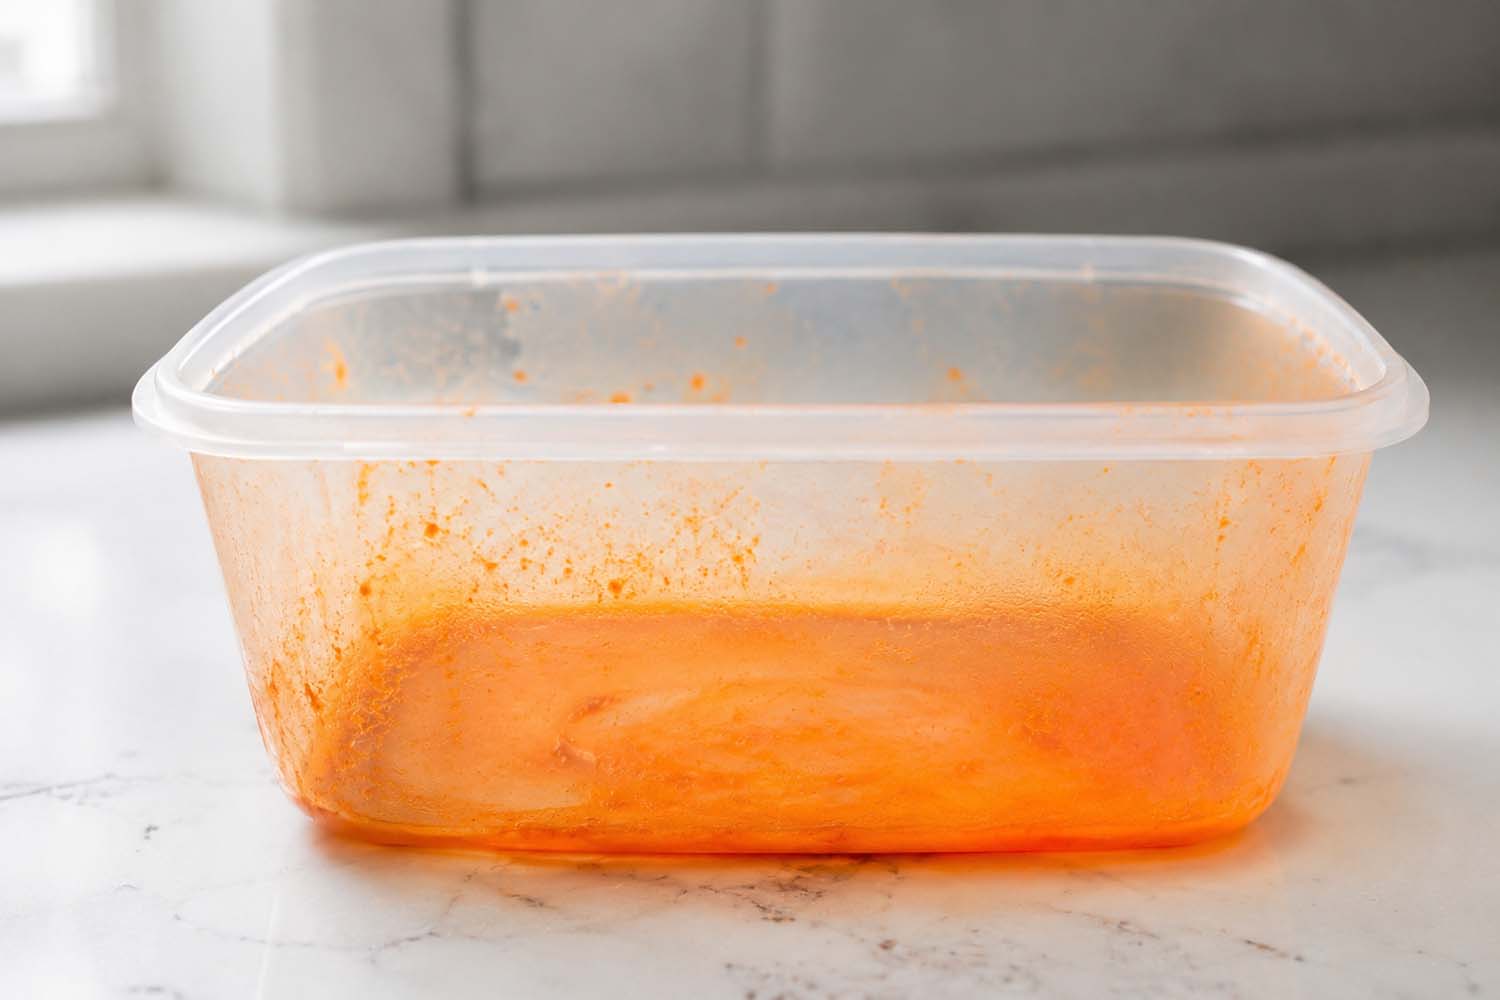
I did it the wrong way for years. After spaghetti night I would scrape the container, load it into the dishwasher, and wake up to find it more orange than before. Not a little more orange. Noticeably, permanently, embarrassingly more orange. I figured the dishwasher hadn’t run hot enough. I ran it again. Still orange. I tried scrubbing with dish soap. Still orange. I gave up and bought new containers, which turned orange within a month because I still didn’t understand the problem.
That orange ring wasn’t going anywhere. I know that now. Every cycle I ran was actively making it worse, baking the pigment deeper while I stood there assuming I just needed more heat or more soap. I didn’t need more of anything. I needed to understand why the stain was there at all.
The problem is lycopene. It’s the pigment that gives tomatoes their red color, and it behaves nothing like a food stain. It behaves like a dye. Once you understand what it’s actually doing to plastic, everything about removing it makes sense, and most of the things you’ve been trying make the situation worse.
The Short Answer:
Make a paste of 2 tablespoons baking soda, 1 teaspoon water, and a small squirt of dish soap. Scrub it into the stained container, let it sit for 30 to 60 minutes, then rinse. After washing, place the container wet-side-up in direct sunlight for a few hours. The baking soda lifts the pigment from the plastic surface; the UV light breaks down what remains. For microwaved stains, expect to repeat the process two or three times.
Avoid the dishwasher on stained containers. The high heat from the drying cycle drives lycopene deeper into the plastic and makes the stain harder to remove, not easier.
Why Tomato Stains Are Different From Every Other Food Stain
Most food stains are water-soluble. Gravy, coffee, fruit juice: soap and water reach in, grab the molecules, and carry them away. Tomato sauce doesn’t work that way because lycopene, the pigment responsible for tomato’s red color, is fat-soluble, not water-soluble.
Fat-soluble means lycopene repels water and seeks out other hydrophobic (water-repelling) materials. Plastic happens to be hydrophobic. When lycopene meets plastic, it finds a compatible surface and bonds to it at a molecular level. Soap and water are hydrophilic. They are chemically incapable of grabbing a hydrophobic pigment that has bonded to a hydrophobic surface. You can scrub forever and accomplish almost nothing because you’re using the wrong chemistry for the job.
The oil in tomato sauce compounds the problem. Most pasta sauces, marinara, and chili contain olive oil or vegetable oil. Oil penetrates plastic’s microscopic pores before lycopene arrives, and once oil is inside those pores, lycopene follows. The sauce becomes a delivery system that drives the pigment deeper than it would go on its own.
Heat is the third factor. Plastic expands when warm. Hot sauce poured directly into a container opens the pores wider than cold sauce would, and microwaving tomato-based food in plastic opens them wider still. This is why a microwaved stain is categorically harder to remove than a stain from sauce that was stored cold: the pigment has penetrated deeper into the material.
Cooking also matters. Heat breaks down tomato cell walls and releases lycopene from where it’s naturally bound, making it more mobile and more likely to migrate into plastic than it would be in raw tomato form. This is why a raw tomato sitting in a container leaves almost no stain while a simmered marinara leaves a significant one.
The Golden Rule: Stop Running It Through the Dishwasher
The dishwasher is the most counterintuitive part of this problem. It feels like the right tool: hot water, strong detergent, high-heat drying. In reality, every one of those features works against you on a tomato stain.
Hot water expands the plastic pores and drives lycopene deeper. Strong detergent is still hydrophilic detergent, which cannot bond with a hydrophobic pigment. High-heat drying then bakes the pigment into place. The container comes out looking worse than it went in, and the stain is now set at a depth that surface cleaning cannot reach.
The correct sequence is cold or cool water, a method that breaks the hydrophobic bond, and UV light to finish the job. Everything else comes after you understand those three levers.
What Kind of Stain Are You Dealing With?
The method that works depends on how deep the lycopene has penetrated, which depends on how it got there.
Fresh stain (sauce stored cold, washed within 24 hours): The easiest situation. Lycopene has had minimal time to penetrate. A baking soda paste alone may clear it completely. If you can wash the container immediately after emptying it, before the sauce dries, dish soap and cool water will remove more than you’d expect.
Refrigerator stain (sauce stored cold for days, then washed): Lycopene penetrates slowly even at refrigerator temperatures. The stain will be pink-orange and noticeable but rarely deep. Baking soda paste plus sunlight handles most of these. Internal link: if you’re storing homemade spaghetti sauce regularly, consider switching to glass containers before you need this guide again.
Microwaved stain (tomato food reheated in plastic): The hardest situation. The heat cycles opened the pores wide repeatedly, and lycopene has bonded deep in the material. Expect two or three treatment cycles. Some microwaved stains can be permanent. This is also the reason most tomato sauces are sold in glass jars.
Lid stains: The interior of plastic lids stains from steam. When you microwave tomato food with the lid on or vented, condensed steam loaded with lycopene drips back down onto the lid surface. Most people wash the container and ignore the lid, then wonder why the stain keeps coming back.
Silicone bags: Silicone is less porous than polypropylene and easier to clean. A baking soda scrub usually handles silicone stains in one pass. The same methods apply, but expect faster results.
Four Methods, Ranked by Effectiveness
1
2
3
4
Pro tip: If you store tomato sauce in plastic containers regularly, prevent the stain before it starts. Coat the inside of the container with a thin layer of cooking spray or vegetable oil before adding the sauce. The oil gives lycopene something else to bond to, keeping it off the plastic surface. Wipe it out before washing and the container stays clean. This is the same reason glass jars don’t stain: glass is non-porous and has no chemical affinity for lycopene.
For tough set-in stains, an enzyme-based stain remover applied to the plastic surface before the baking soda step can help break down any protein residue from meat-based sauces like Bolognese before you address the lycopene.
While you’re here: if tomato sauce stained the container, there’s a chance it got on your shirt too. The treatment is different for fabric. See the full guide: How to Get Tomato Sauce Out of Clothes.
Container Types: What You’re Actually Working With
Polypropylene and polyethylene (standard Tupperware and most food storage containers): The most common and the most prone to staining. Both are hydrophobic polymers with a strong affinity for lycopene. All four methods work. Avoid aggressive scrubbing pads that scratch the surface. Once deeply scratched, these containers stain faster and are harder to clean.
Plastic lids: Same material as the container, same methods. Treat the lid interior as a separate stain. Steam from microwaved tomato food deposits lycopene on the lid surface, often in a ring pattern around the steam vent. Many people wash the container thoroughly and forget the lid, then wonder why everything still smells and looks orange.
Silicone bags and containers: Silicone is less porous than polypropylene and does not have the same chemical affinity for lycopene. Stains still occur but are shallower. A baking soda paste scrub handles most silicone stains in a single pass. Sunlight also works well. Silicone is generally the better choice for tomato storage if you want to avoid this problem entirely.
Glass containers with plastic lids: The glass body will not stain. Treat the plastic lid the same as any other plastic container. If you’re in the market for new containers and tomato sauce is a regular part of your cooking, glass bodies with plastic lids are the practical middle ground between full glass and full plastic.
Clear plastic vs. colored plastic: Darker or opaque plastic containers hide the stain but do not resist it. The lycopene is still there. Clear containers show the staining more visibly, which is useful for knowing when to treat, but the underlying chemistry is identical.
The Full Protocol for a Stained Container
Step 1: Rinse the container with cool water immediately after emptying it. Remove any remaining sauce before it dries. Do not use hot water.
Step 2: Make the baking soda paste. Combine 2 tablespoons of baking soda, 1 teaspoon of water, and a small squeeze of dish soap. The paste should be thick enough to cling to the container walls without running.
Step 3: Apply the paste to all stained surfaces with a soft sponge. Cover the stain fully, including any staining on the lid interior. Do not scrub yet.
Step 4: Let the paste sit for 30 to 60 minutes. Longer is better for deeper stains. Microwaved stains benefit from the full hour.
See also

Step 5: Scrub gently with a non-abrasive sponge in circular motions. You should see orange-tinted residue lifting onto the sponge. Rinse thoroughly with cool water.
Step 6: Wash the container with dish soap and cool water as usual. Inspect in good light. If the stain has lightened but not cleared, the container is ready for the sunlight step.
Step 7: Place the clean, damp container open-side-up in direct sunlight for two to four hours. Bring it in, wash once more, and dry. Repeat the whole cycle if a faint tint remains after the first pass.
Never do these things:
- Don’t run a stained container through the dishwasher. High heat from the drying cycle drives lycopene deeper into the plastic and makes the stain significantly harder to remove.
- Don’t pour sauce into plastic while it’s hot. Heat expands plastic pores and accelerates penetration. Always cool sauce to at least room temperature before transferring.
- Don’t microwave tomato-based food in plastic containers. This is the leading cause of stains that never fully clear. Use a glass or ceramic dish for reheating.
- Don’t scrub before soaking. Dry scrubbing on a fresh stain can scratch the surface and spread the pigment. Always soak first.
- Don’t combine bleach and sunlight in the same session. Out of an abundance of caution, use one or the other. Rinse the container thoroughly after bleach before any sun exposure.
- Don’t use undiluted bleach. The ACI recommends 2 teaspoons per gallon of water. Undiluted bleach can degrade plastic and is unsafe for food contact surfaces without thorough rinsing.
What Definitely Does Not Work
Plain dish soap and water: This is the default move and it almost never clears a tomato stain. Soap is hydrophilic; lycopene is hydrophobic. They don’t interact meaningfully. Dish soap removes sauce residue but leaves the pigment bonded to the plastic.
Scrubbing harder: Effort does not substitute for the right chemistry here. Aggressive scrubbing scratches the plastic surface, increases its porosity, and makes future staining worse. The method requires dwell time, not force.
Hot water rinses: Hot water feels like it should clean better. For lycopene on plastic, it does the opposite. Warm plastic is more porous plastic. Always use cool water at every stage of this process.
Running through the dishwasher repeatedly: Each cycle sets the stain deeper. If you’ve been dishwashing a stained container hoping it will eventually clear, it won’t. The damage accumulates with each heat cycle.
Lemon juice alone: Lemon juice has a mild bleaching effect and works as a natural follow-up to other methods, but it’s too weak to clear an established tomato stain on its own. Useful as a supplement, not a primary method.
The One Thing I Wish I’d Known Sooner
The stain isn’t happening when you store the sauce. It’s happening the moment you microwave the sauce in the container. That’s the decision that determines whether the stain comes out or doesn’t. I reheated tomato-based food in plastic containers for years before I understood this, and I threw out a lot of perfectly good containers because I thought they were ruined. They weren’t ruined at the storage stage. I ruined them in the microwave.
Keep one glass dish specifically for reheating tomato food. Transfer from the plastic storage container to the glass dish, microwave in the glass, eat from the glass, put the plastic storage container in the refrigerator clean. The staining problem essentially disappears.
Final Thoughts
The orange container in your cabinet is not defective and it’s not your fault for not scrubbing hard enough. It’s the result of a chemistry mismatch: fat-soluble lycopene bonded to hydrophobic plastic, treated with hydrophilic soap that has no way of reaching it. Once you know that, the fix makes sense. Break the hydrophobic bond with baking soda paste, then use UV light to finish off what remains. Stop running stained containers through the dishwasher.
If tomato sauce is a regular part of your cooking, the prevention strategy matters more than any removal method. A thin coat of cooking spray before filling is a 10-second habit that prevents the problem entirely. A glass container eliminates it.
For the clothes side of the same problem, the chemistry is different: how to get tomato sauce out of clothes covers the fabric version. And if you’re curious why ketchup behaves differently from pasta sauce despite both being tomato-based, the answer is in the vinegar and sugar content: how to get ketchup out of clothes.
Frequently Asked Questions
Why do tomato stains turn plastic orange instead of red?
Lycopene is a deep red pigment in concentrated form, but when it penetrates plastic and bonds at low concentration across the surface, it appears as a faint orange tint rather than vivid red. The same effect happens when lycopene stains white or light-colored fabric. The dilution across the porous surface shifts the perceived color from red toward orange.
Does the dishwasher remove tomato stains from plastic containers?
No, and it typically makes them worse. High heat from the drying cycle drives lycopene deeper into the plastic’s pores. If your container went into the dishwasher and came out more orange, that’s why. Hand-wash with cool water for all stages of this process.
Can you use bleach on plastic food containers?
Yes, with the right dilution and thorough rinsing. The American Cleaning Institute recommends 2 teaspoons of unscented chlorine bleach per gallon of water. Soak for one to two hours, then wash with dish soap and rinse several times before using the container for food again. Don’t use undiluted bleach and don’t follow bleach with the sunlight method in the same session.
How do you get tomato stains out of Tupperware lids?
The same way you treat the container body. Lids stain from steam when tomato food is microwaved with the lid on. Apply baking soda paste to the interior surface of the lid, let it sit 30 to 60 minutes, scrub gently, and follow with sunlight. Many people clean the container and ignore the lid, which is why the set keeps looking stained even after washing.
Does sunlight actually work on tomato stains in plastic?
Yes, and the mechanism is real. UV rays break down lycopene’s carotenoid bonds through photodegradation, the same process by which dyes fade in sunlight. It works best on residual orange tint after a baking soda treatment, or on fresh and light stains on their own. It’s less effective on deep microwaved stains where the lycopene has penetrated far into the material. Direct outdoor sun works faster than a windowsill, since glass filters some UV.
Why does tomato sauce stain plastic but not glass?
Glass is non-porous and chemically inert. Lycopene has no pores to penetrate and no chemical affinity for the glass surface. It sits on top and washes away with dish soap. Plastic is porous and hydrophobic, which means lycopene bonds to it both mechanically (by penetrating the pores) and chemically (by hydrophobic attraction). This is also why most commercial tomato sauce is sold in glass jars.
Is it safe to use stained plastic containers for food?
An orange-stained container is cosmetically unpleasant but not inherently unsafe. Lycopene is a natural antioxidant with no toxicity concerns. The more relevant safety question is whether the plastic itself has been degraded by heat cycles: a container that has been repeatedly microwaved may have surface scratches and micro-damage that harbor bacteria more easily. If the container is heavily scratched, warped, or deeply stained from repeated microwave use, replacing it is the right call.
How do you get the tomato sauce smell out of a plastic container?
The baking soda paste step addresses both the stain and lingering odor at the same time, since baking soda neutralizes acidic odor molecules. If the container smells but isn’t visibly stained, fill it with warm water and one tablespoon of baking soda, seal the lid, shake for 30 seconds, and let it sit overnight. Drain, wash, and dry completely before storing. A fully dry container stores odor-free; a container sealed while damp will develop a smell no matter how clean it is.
Better Living may earn commissions through affiliate links and may occasionally feature sponsored or partner content. If you make a purchase through our links, we may receive a small commission at no cost to you.